Concerning Digital Thermometer Accuracy
Veröffentlicht Juni 03, 2019 von Advanced Energy Editor
.jpg?lang=en-US)
Accuracy within the realm of digital thermometers has many definitions, depending upon your point of reference.
- The number of significant digits
- The degree to which a measurement conforms to the correct value
- True or false
- A combination of systemic errors and statistical bias
The resolution, or number of significant digits in the thermometer display, is important but not absolute. A meter that can display down to 1° cannot be more accurate than 1°. However, the meter can be significantly less accurate also. The least significant digit only shows the potential of accuracy. Resolution is useful for monitoring when the temperature has stabilized or for the direction of drift. A digital thermometer with 0.1° resolution can be more useful in this way than a thermometer with 1° resolution even if they have the same accuracy.
The Metrology – the Science of Measurement – definition of accuracy used for test and measurement is the last definition above – a combination of systemic errors and statistical bias. Metrology uses the terms Precision and Trueness to define the two parts of accuracy. Precision is how closely a set of readings vary from one another. Trueness is how much the average of the set of readings varies from the actual true value. A statistical average of Trueness + Precision = Accuracy.
To establish the accuracy statement for a digital thermometer, many of its characteristics must be evaluated. For example, the number of significant digits, repeatability, thermal characteristics, the conformance to the sensor curve, and, if using thermocouples, the internal accuracy of the Cold Junction Compensation (CJC), are characteristics to evaluate.
Once all the uncertainties are normalized, and a standard deviation is determined, then a K factor (typically 2) is used to define a larger uncertainty – which gives a 95% Confidence level that all readings will fall within that range (of 2x the standard deviation for the uncertainties). The result is an “accuracy” specification with a ± range.
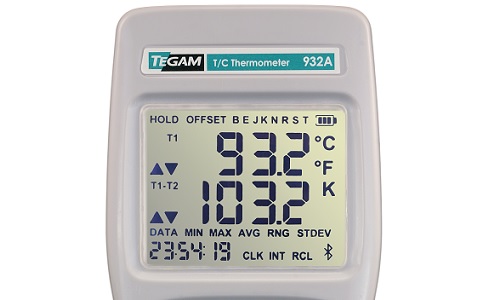
For example, TEGAM 911 and 912 digital thermometers have an accuracy specification of ±(0.04% Rdg + 0.3°C) over the ambient temperature range of 18 to 28°C. This specification also includes the CJC so that all the thermal errors all included. The 911 and 912 digital thermometers also have 0.1-degree resolution.
At 0°C, the accuracy of a measurement is 0° x 0.04% = 0 + 0.3°C = 0.3°C
Note: the 91x Series has a probe offset feature so that you can adjust any probe offset at zero out the reading.
At 100°C, the accuracy of the measurement is 100° x 0.04% = 0.04° + 0.3°C = 0.34°C, but remember that the digital display is only 0.1°.
At 1000°C, the accuracy of the measurement is 1000° x 0.04% = 0.4° + 0.3°C = 0.7°C (exclusive of probe error).
Some details to watch out for when interpreting accuracy specifications for digital thermometers include:
- Some digital thermometers have the CJC uncertainty specified separately (not included in their “accuracy” specification) and this typically can add an addition ±0.2 to 0.5°C.
- Some digital thermometers have their accuracy specified “at 23°C” rather than over a working temperature range. Unless you are going to use the measuring instrument in a climate-controlled laboratory environment, you will have to calculate the thermal errors and then add those to the “accuracy specification” to account for the actual ambient temperature at your measurement site.
To calibrate a digital thermometer, by modern standards, you want to use an instrument that has either 4x the accuracy of the unit you are going to calibrate (a 4 TUR) or you need to use guardbanding techniques.
What is Guardbanding?
The guardband method of calibrating thermometry instruments establishes an offset range from the ultimate pass/fail specification smaller than the limits of the specification, in order to account for uncertainties in the measurements. This technique has been developed to limit the risk that an out of limits unit is “passed.”
Within ISO 17025, using guardbanding gives you three possible outcomes:
- A unit inside the guardband range is PASS.
- A unit inside the specification limits but outside the guardband is “Indeterminate.”
- A unit outside the specification limits is “Fail.”
Any reading in the indeterminate range could possibly be inside or outside the accuracy range due to the calibration system’s uncertainties and may require further testing to establish whether the unit meets its specifications.
For more information on statistical analysis of uncertainties, you can refer to this link safely: https://physics.nist.gov/cuu/Uncertainty/index.html
Interested in learning more about TEGAM’s wide selection of digital thermometers for research and production applications, including intrinsically safe digital thermometers and temperature calibrators? Visit this section today to see them all.
Please reach-out to us with any questions or queries you may have and we’ll get back to you quickly. You can also request a DEMO of our digital thermometers or any of our Test & Measurement instrumentation for industrial, manufacturing or research applications.
